Install Lyrion Music Server (LMS)
1. Connect the Raspberry Pi and Initial Configuration
Insert the SD card into your Raspberry Pi, attach a wired ethernet connection, and plug in the power. Give your Raspberry Pi a minute or so to power up and connect to your local network.
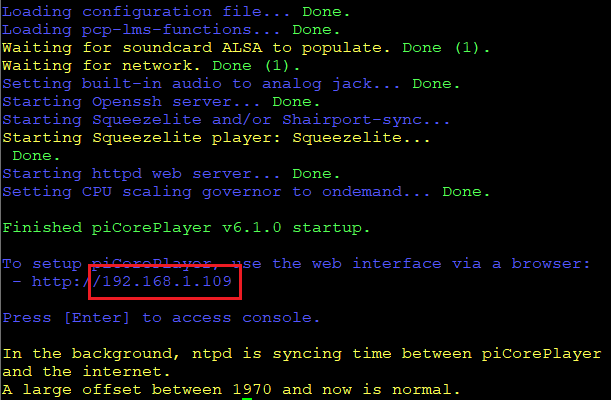
Then look at the boot console. The IP address will be displayed at the end of the boot process.
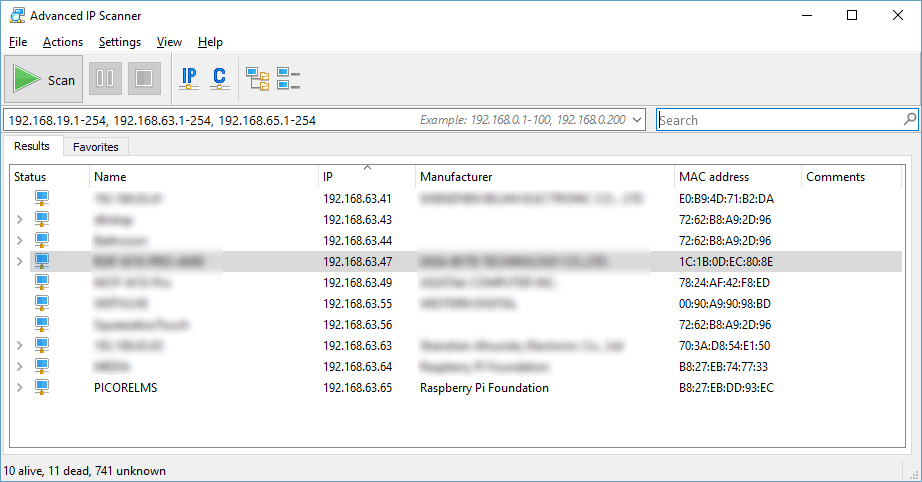
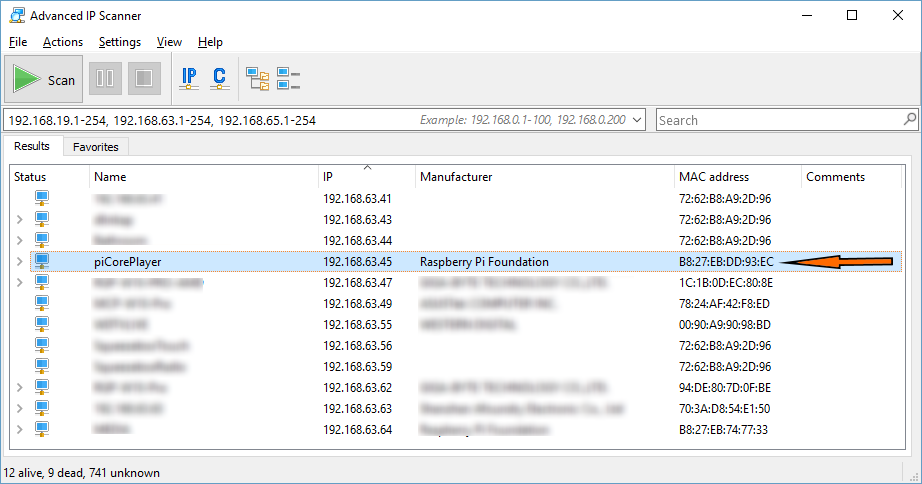
Or launch Advanced IP Scanner to identify the IP address that has automatically been assigned by your network to the Raspberry Pi via DHCP.
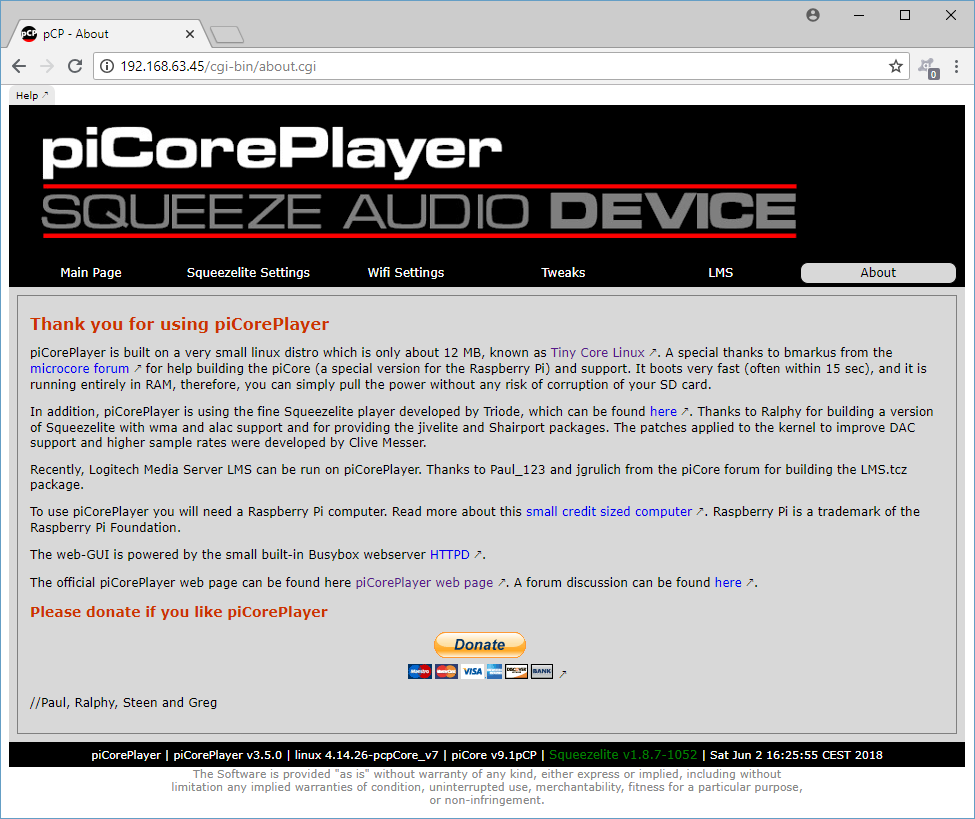
Fire up your favourite browser, and enter the IP address you found from the previous step. You should now see the pCP welcome screen.
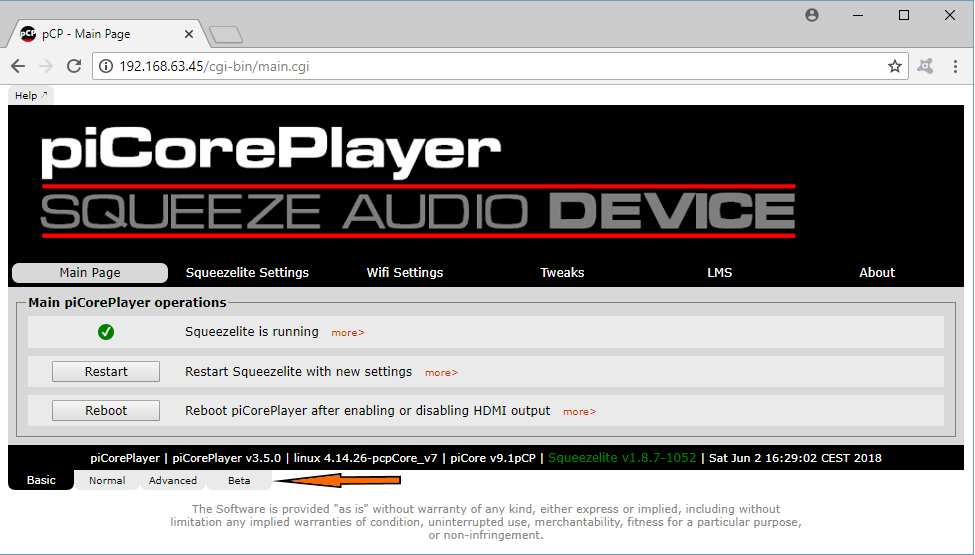
Select [Main Page] and then [Beta]. Note the warning that is given !
pCP 9: Select [Main Page]. Note the warning that is given !
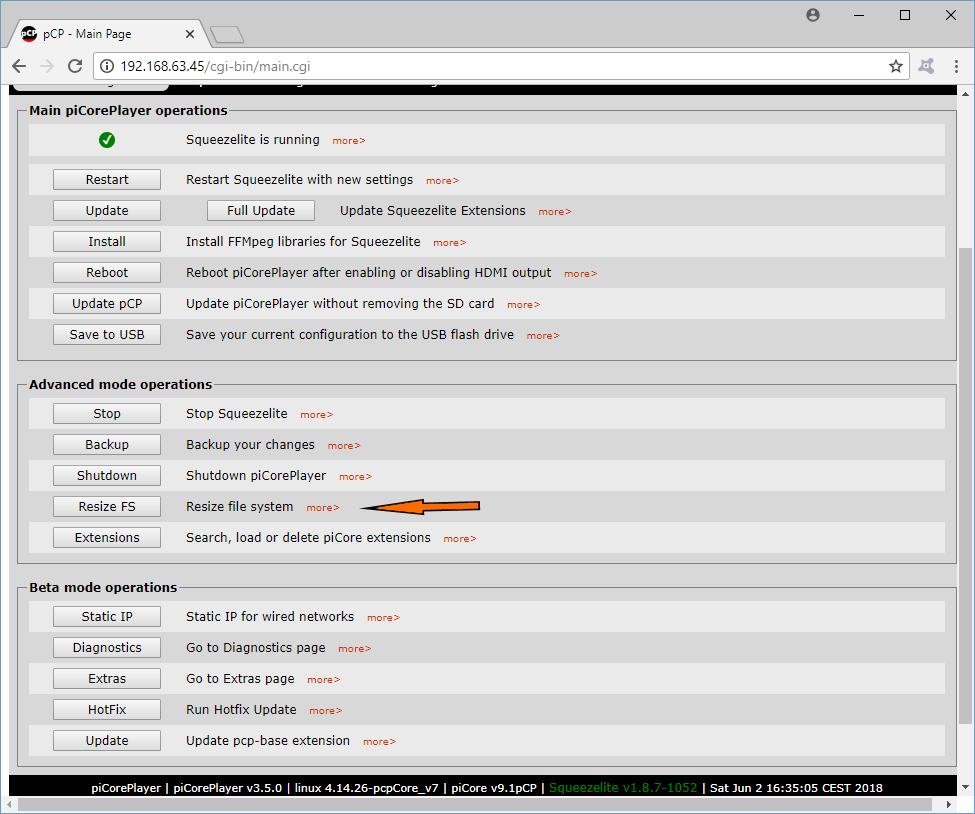
Move down to “Advanced mode operations” and select [Resize FS].
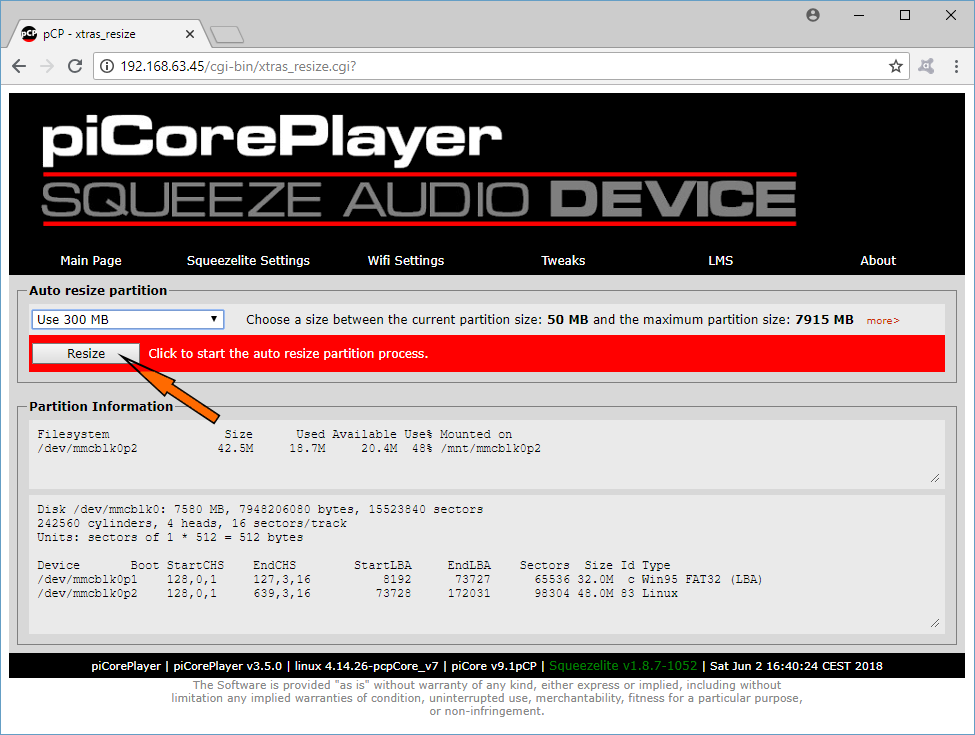
Select “Use 1000 MB” and hit the resize button.
Danger
If you have a large library select “Use 2000 MB” or “Whole SD card”.
pCP will go away for a while to do it’s thing, but eventually it should refresh and you should be back on the [Main Page].
2. Install LMS
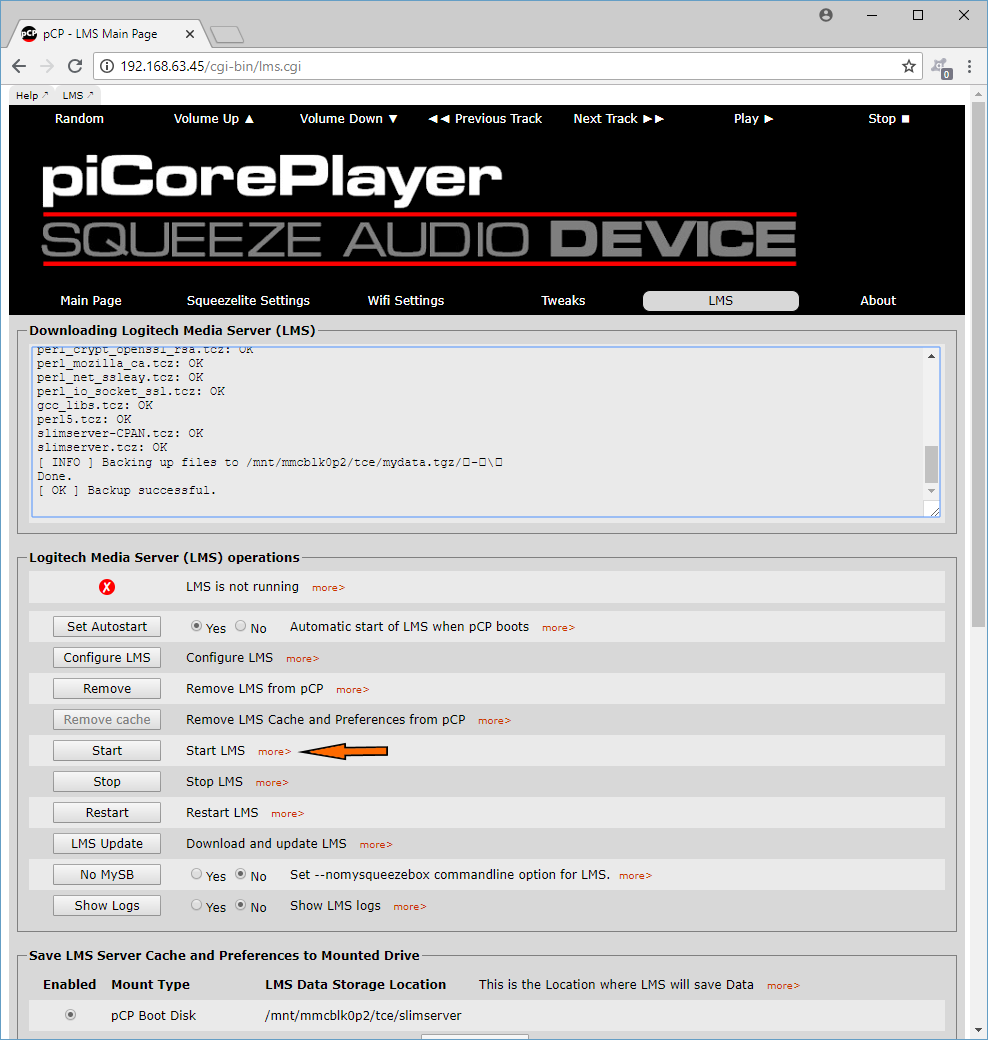
Select [LMS] from the [Main Page] menu bar, and then click on [Install] in “Lyrion Music Server (LMS) operations”.
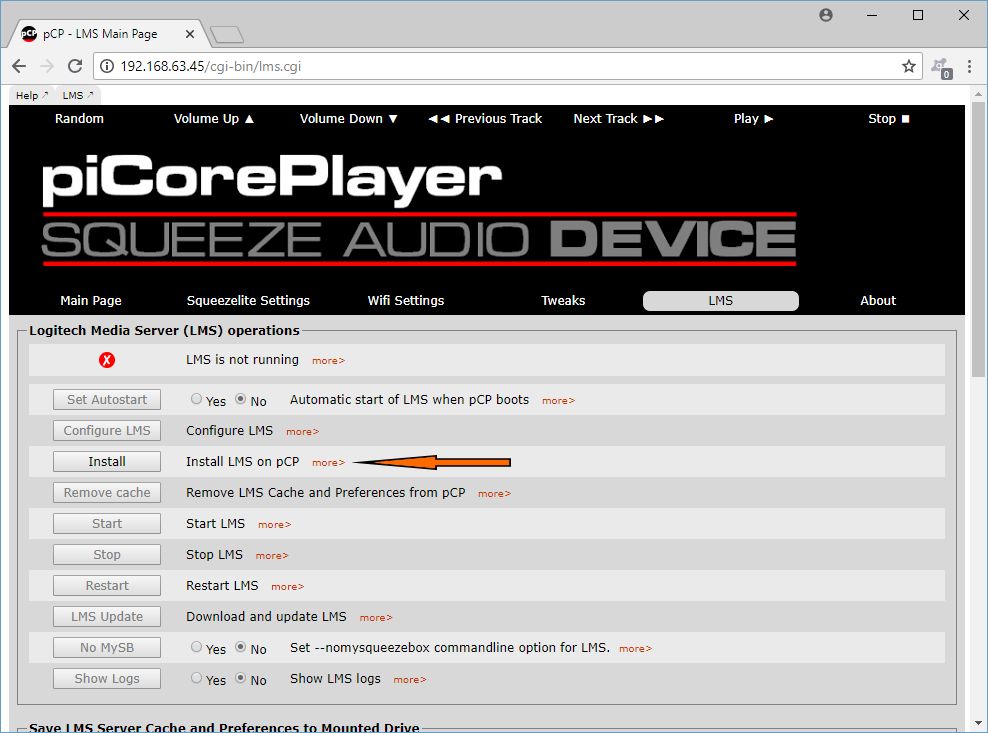
After installation LMS is not automatically started, so start it by selecting the [Start] item in “Lyrion Music Server (LMS) operations”.
3. Tips and Tweaks
3.1 Turn Off the Internal Player
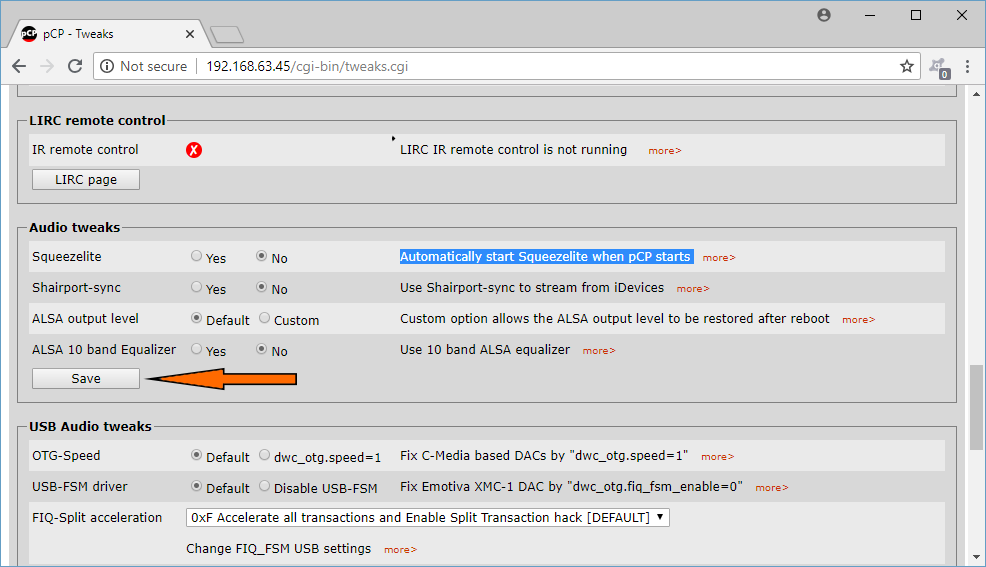
Select [Tweaks] from the menu bar, scroll down to the “Audio tweaks” section and set “Automatically start Squeezelite when pCP starts” to “No” and then hit [Save]. Reboot the Raspberry Pi for the changes to take effect.
3.2 Show piCoreLMS rather than piCorePlayer as the name
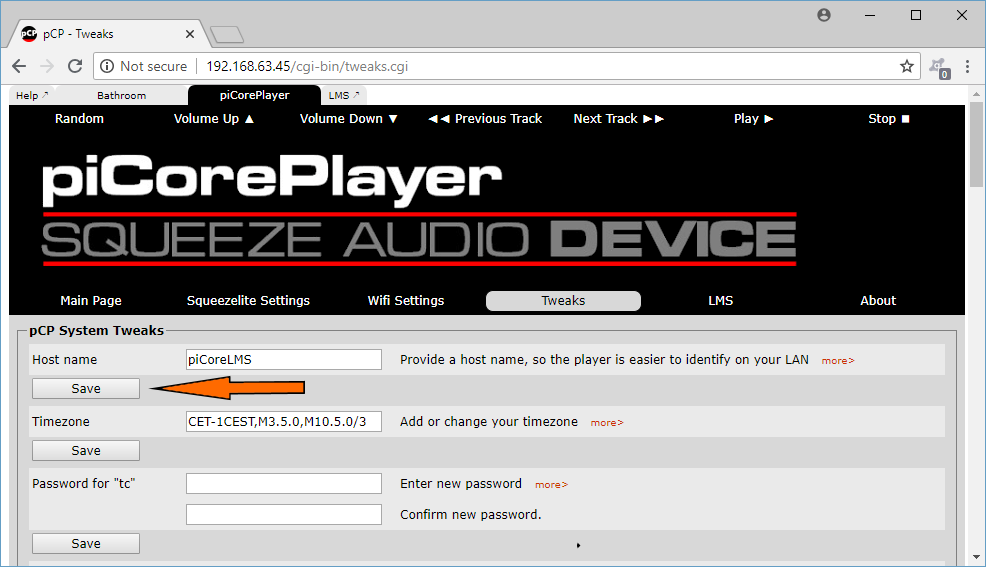
Select [Tweaks] from the menu bar, change the “Host name” to your required value and then hit [Save]. Reboot the Raspberry Pi for the changes to take effect.
3.3 Set a Fixed IP Address
As this is an ‘always-on’ server providing music to the entire household, I have chosen to give it a fixed IP Address rather than an address automatically assigned by your router via DHCP.
IF YOU DON’T FULLY UNDERSTAND THE PRINCIPLES BEHIND THIS, PLEASE DO NOT ATTEMPT IT.
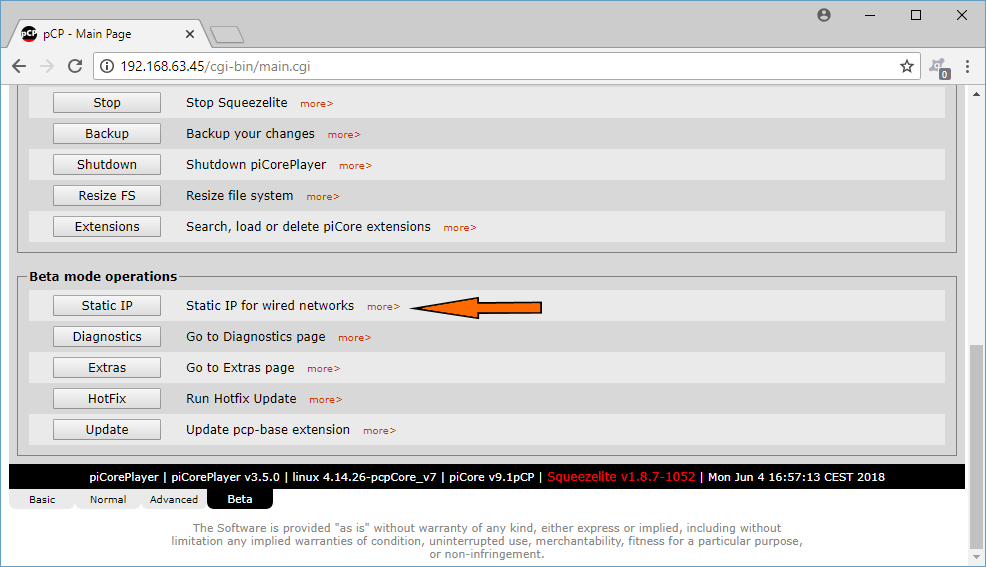
Select [Main Page] in [Beta] > [Static IP].
pCP 9: Select [Main Page] > [Static IP].
Enter the required information and then hit [Save].
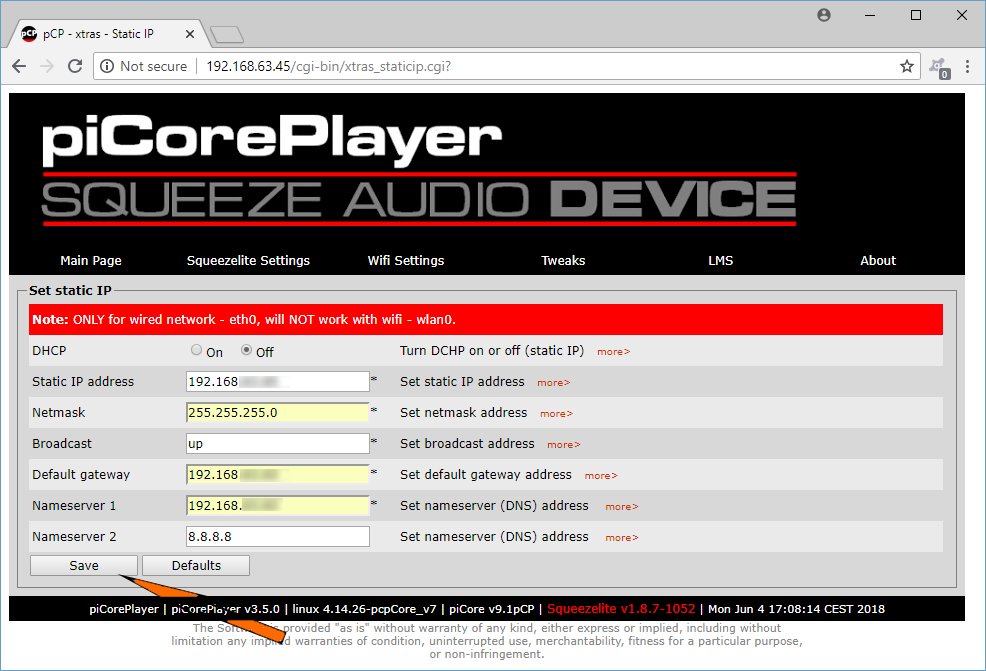
Return to the [Main Page] and reboot the Raspberry Pi for the changes to take effect.
Re-running Advanced IP Scanner will show the new fixed IP address.
