Setup Wifi
Warning
If you have added # Maintained by user to the first line of your wpa_supplicant.conf file, the piCorePlayer GUI will completely ignore your configuration file. It can only be maintained by using a text editor.
Prerequisites
- piCorePlayer has already been successfully setup.
- piCorePlayer is connected to the LAN using wired ethernet.
- The Wifi adapter is supported by piCorePlayer.
- wpa_supplicant.conf does not exist.
- wpa_supplicant.conf does not have
# Maintained by userat the beginning of the first line.
Warning
wpa_supplicant.conf will be overwritten each time you press [Save] on the [Wifi Settings] page.
Steps
Step 1 - Insert USB Wifi adapter (optional)
- If you are not using the built-in Wifi adapter, insert the USB Wifi adapter.
Step 2 - Go to [Wifi Settings] page
- Click on [Wifi Settings].
Step 3 - Turn Wifi on
- Select “Set Wifi configuration” > Wifi > “On” - (1).
- Click [Save] - (2).

This will refresh the [Wifi Settings] page with all the wifi options enabled.
Step 4 - Get SSID
- Click “Wifi information” > [Scan] to scan for available networks.

- Note the SSID of your Wifi network (or highlight with mouse and copy (ctrl-c)).

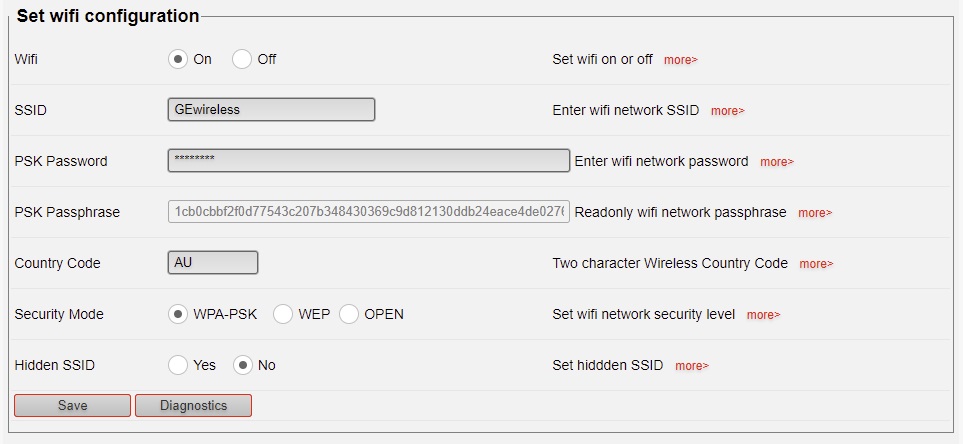
Step 5 - Fill in the “Set Wifi configuration” fields
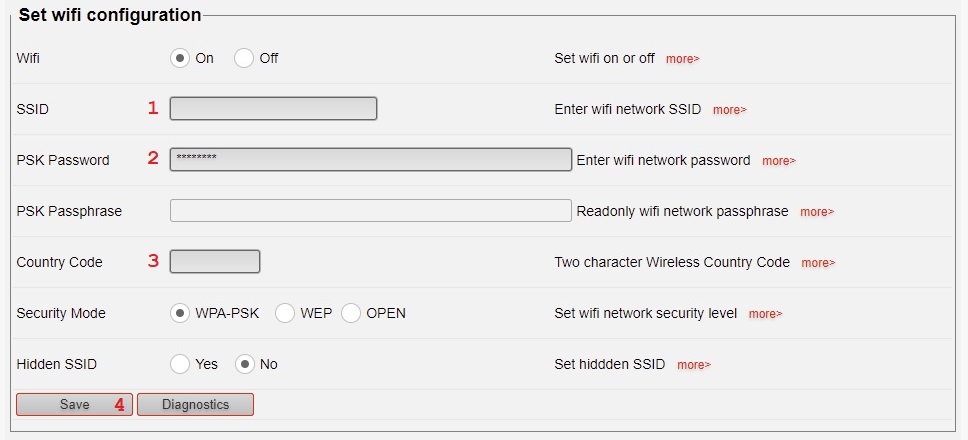
- Type your “SSID” - (1).
- Type your “PSK Password” - (2).
- Type your “Country Code”—see Country Code. - (3).
- Click [Save] to save your Wifi settings - (4).

Info
Your “PSK Password” will be converted to a secure “PSK Passphrase”. piCorePlayer does not save your password as plain text anywhere.

Step 6 - Connected to Wifi network
Confirm piCorePlayer has connected to your wifi network.
- Check “Wifi information” > “Wifi IP” for the IP address being used.

Step 7 - Remove ethernet cable
- Click [Main Page].
- Click [Shutdown].
- Remove the wired ethernet cable.
- Apply power to boot.
- When piCorePlayer has booted, you should be connected to your Wifi network.
Warning
When piCorePlayer changes from a wired network to a wifi network, a different MAC address will be used, resulting in an additional player instance being created by LMS. Also, as the network device has changed, your DHCP server will allocate a new IP address to the wifi device. This IP address will be different from the original wired network device’s IP address.
Step 8 - Reset Jivelite (optional)
Warning
If you have previously setup Jivelite with a different network device, you will need to reset Jivelite, then setup Jivelite again on the current network device.
- [Reset] Jivelite on the GUI [Tweaks] page.
- Setup Jivelite on the Jivelite screen.
- Click [Main Page] > [Backup].
More information
- Setup Wifi without ethernet
- Wifi does not work
- Example wpa_supplicant configuration file
- WPA Supplicant
- The Short List - Superstar USB WiFi Adapters for Linux
- Utility for compiling out of tree kernel modules for pCP Kernels