Setup Wifi without ethernet
wpa_supplicant.conf to the boot partition (Using a setup computer) may be the only option.
Situations like the following:
- You have a Raspberry Pi without built-in wired ethernet so wifi is the only option.
- You want to use Raspberry Pi’s built-in Wifi.
- You don’t have wired ethernet available.
See what networking options are available on the various models of the Raspberry Pi—see Raspberry Pi.
Below is the standard format of a wpa_supplicant.conf file that is generated by piCorePlayer.
# Maintained by piCorePlayer
ctrl_interface=/var/run/wpa_supplicant
ctrl_interface_group=staff
country=US
update_config=1

network={
	ssid="yourssid"
	psk="password"
	key_mgmt=WPA-PSK
	auth_alg=OPEN
}
Under most circumstances it is probably better to let piCorePlayer maintain your wpa_supplicant.conf file—see Maintained by piCorePlayer.
But if you really have a more complex wifi setup and know how to generate the appropriate wpa_supplicant.conf properly, then the # Maintained by user method can be used—see Maintained by user.
Maintained by piCorePlayer
Steps
Step 1 - Create SD card
- Burn image to a SD card—see Burn piCorePlayer onto a SD card.
Info
Do not eject the SD card as you need to add “wpa_supplicant.conf” to the boot partition.
Step 2
Create a new file, or download a sample wpa_supplicant.conf and modify.
- Used for quick setup at boot.
- Can be later maintained via pCP web interface.
- Do not use special characters.
Type or copy one of the following using your text editor (ie. Notepad++).
Maintained by piCorePlayer
# Maintained by piCorePlayer
ctrl_interface=/var/run/wpa_supplicant
ctrl_interface_group=staff
country=US
update_config=1

network={
	ssid="yourssid"
	psk="password"
	key_mgmt=WPA-PSK
	auth_alg=OPEN
}
Bare minimum
ssid="yourssid"
psk="password"
Step 3
- [Save As] the file “DRIVE:\wpa_supplicant.conf” to the boot partition.
On a Windows PC, DRIVE will be the drive letter for your SD card. (ie. F:)
Step 4
- Eject SD card.
Step 5
- Insert SD card into piCorePlayer.
Step 6
- Apply power.
Example of wpa_supplicant.conf processing
Steps
Step 1 - User created wpa_supplicant.conf
ssid="yourssid"
psk="yourpassword"
Step 2 - piCorePlayer created wpa_supplicant.conf
# Maintained by piCorePlayer
ctrl_interface=/var/run/wpa_supplicant
ctrl_interface_group=staff
update_config=1

network={
	#enc_ssid="yourssid"
	ssid="yourssid"
	psk="yourpassword"
	key_mgmt=WPA-PSK
	auth_alg=OPEN
}
Step 3 - piCorePlayer GUI created wpa_supplicant.conf
# Maintained by piCorePlayer
ctrl_interface=/var/run/wpa_supplicant
ctrl_interface_group=staff
country=AU
update_config=1

network={
	#enc_ssid="yourssid"
	ssid="yourssid"
	psk=bd9abb43d0e2dd30bd92049f926debe09fc87c8eb18f1bdabe8e17453020bfa6
	key_mgmt=WPA-PSK
	auth_alg=OPEN
}
Maintained by user
For advanced users.
Steps
Step 1 - Create SD card
- Burn image to a SD card—see Burn piCorePlayer onto a SD card.
Step 2
- User maintains by placing this on the boot disk to update.
- pCP will not modify in any way.
- Special Characters are allowed.
# Maintained by user
ctrl_interface=/var/run/wpa_supplicant
ctrl_interface_group=staff
country=US
update_config=1

network={
	ssid="Your SSID"
	psk="P@ssword"
	key_mgmt=WPA-PSK
	auth_alg=OPEN
}
Step 3
- [Save As] the file “DRIVE:\wpa_supplicant.conf” to the boot partition.
On a Windows PC, DRIVE will be the drive letter for your SD card. (ie. F:)
Step 4
- Eject SD card.
Step 5
- Insert SD card into piCorePlayer.
Step 6
- Apply power.
Using setup with keyboard and monitor
Warning
Setup may not always be completely up-to-date because it is the last thing to be tested and updated.
Steps
Step 1 - Create SD card
- Burn image to a SD card—see Burn piCorePlayer onto a SD card.
Step 2 - Boot piCorePlayer
- Insert SD card.
- Plug in keyboard and monitor.
- Apply power.
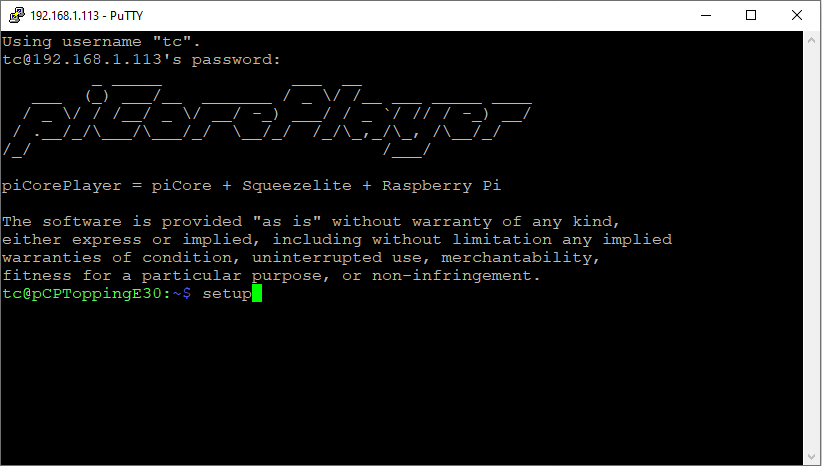
Step 3 - Login
- Login into your piCorePlayer:
- login as:
tc - password:
piCore(default)
- login as:
- Type
setup.
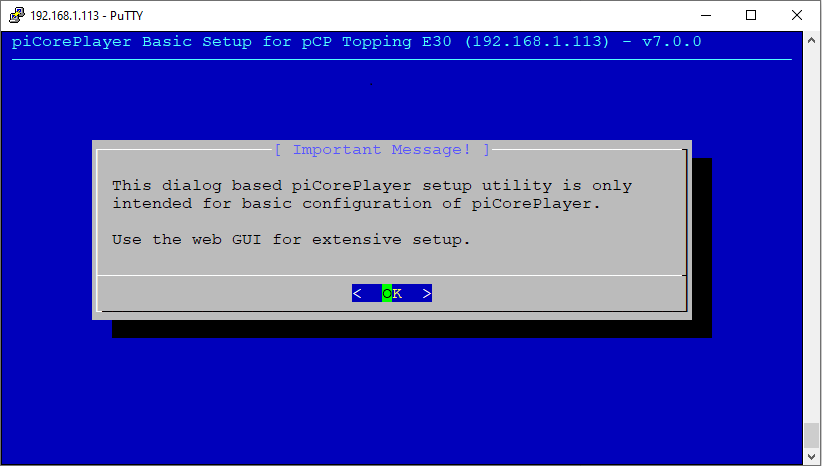
Step 4 - Read message
- Click [OK].
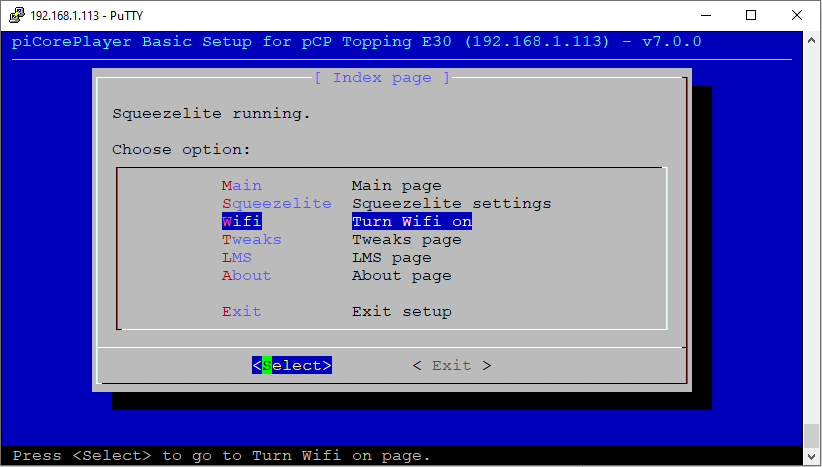
Step 5 - Select Wifi
- Select [Wifi].
- Click [Select].
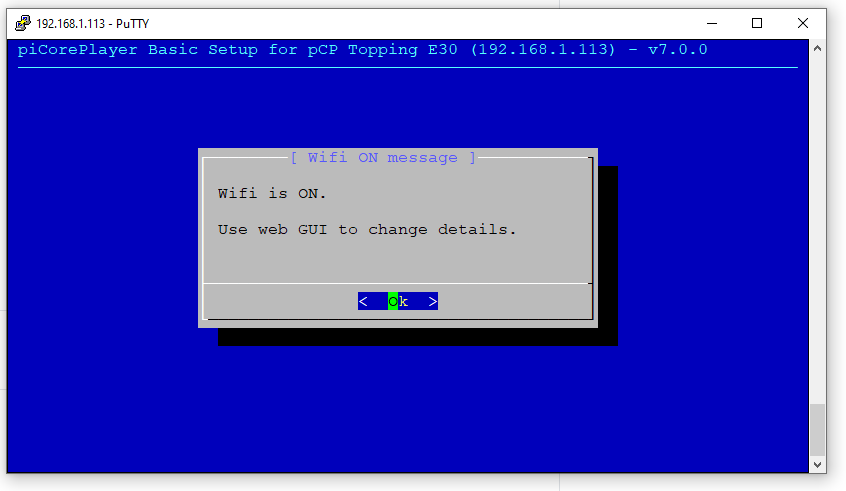
Step 6 - Wifi already on
Warning
If you get this message, wifi is already setup. Use the web GUI to setup Wifi further.
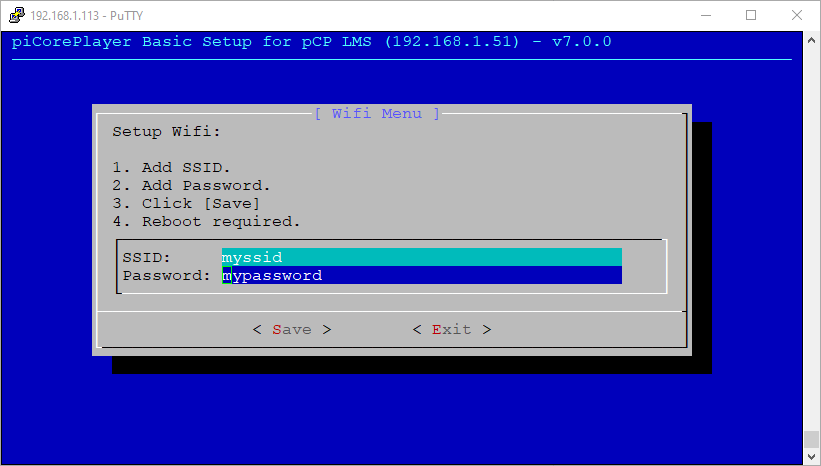
Step 7 - Enter SSID and password
Warning
Special characters may not work.
- Enter your SSID.
- Enter your Password.
- Click [Save].
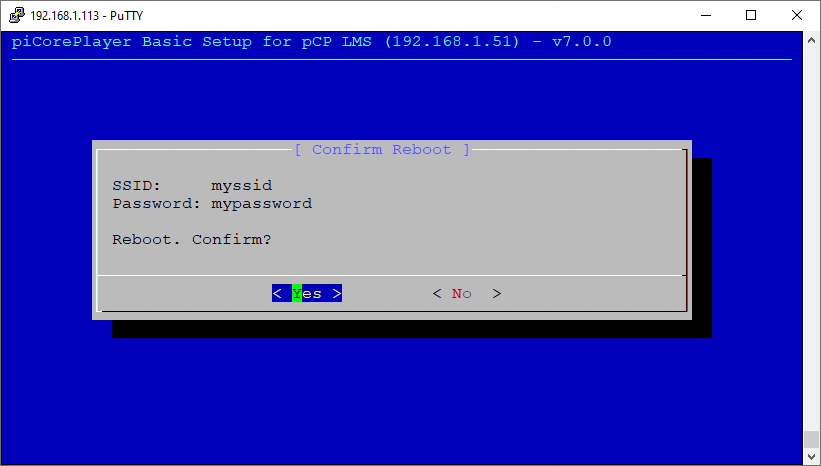
Step 8 - Reboot
- Click [Yes].
Step 9 - Final
- piCorePlayer will reboot with wifi active.
More information
- Setup Wifi
- Wifi does not work
- Example wpa_supplicant configuration file
- WPA Supplicant
- The Short List - Superstar USB WiFi Adapters for Linux
- Utility for compiling out of tree kernel modules for pCP Kernels