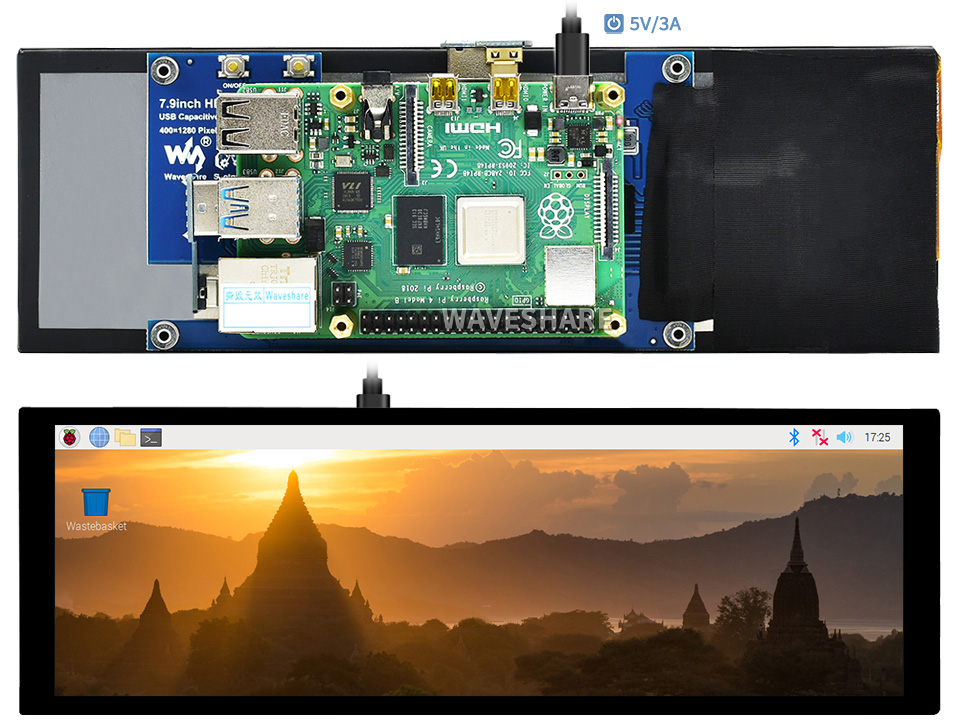
Add a 7.9 inch Waveshare display

Steps
Step 1 - Prepare SD card
- Put a fresh pCP image on to the SD card—see Burn piCorePlayer onto a SD card.
- While the SD card is still in the laptop/pc:
- Enter wifi credentials in wpa_supplicant.conf.sample and “save as” wpa_supplicant.conf.
- Add the following lines to config.txt, in the Custom Configuration area at the end of the file (between the Begin-Custom and End-Custom lines).
#---Begin-Custom-(Do not alter Begin or End Tags)-----
gpu_mem=128
disable_splash=1
avoid_warnings=2
hdmi_group=2
hdmi_mode=87
hdmi_timings=400 0 100 10 140 1280 10 20 20 2 0 0 0 60 0 43000000 3
display_rotate=3 #270 degrees
#---End-Custom------------------------
Info
You find these two files in your Windows Explorer in root-section of the pcp_boot drive.
- Comment out the
gpu_mem=16andlcd_rotate=2default settings by putting an # at the beginning of the line. - Save your changes.
Step 2 - Boot Raspberry Pi
- Put the SD card in your RPi and boot.
- Find the IP address of the RPi, and enter this in a browser—see Determine your piCorePlayer IP address.
- Once the RPi has booted up, this should bring up the pCP web interface.
- On [Main Page] scroll down to “Additional functions” and click on “Extensions”. Wait for green ticks, then click on the [Available] tab. In the ‘Available extensions in the piCorePlayer repository’ section.
- Load nano.tcz extension.
- Install Jivelite from the [Tweaks page] (this step includes an automatic backup, so accept the reboot prompt.)
- After the reboot do not configure jivelite – we’ll do this later!
Step 3 - Make a custom jivelite.sh startup script
Note This has changed for pCP version 10 and higher. The jivelite startup script is now considerably more sophisticated, and you may not need a custom jivelite script at all. If you do find you need one, be sure to include the line starting ’export HOME …’ as shown below.
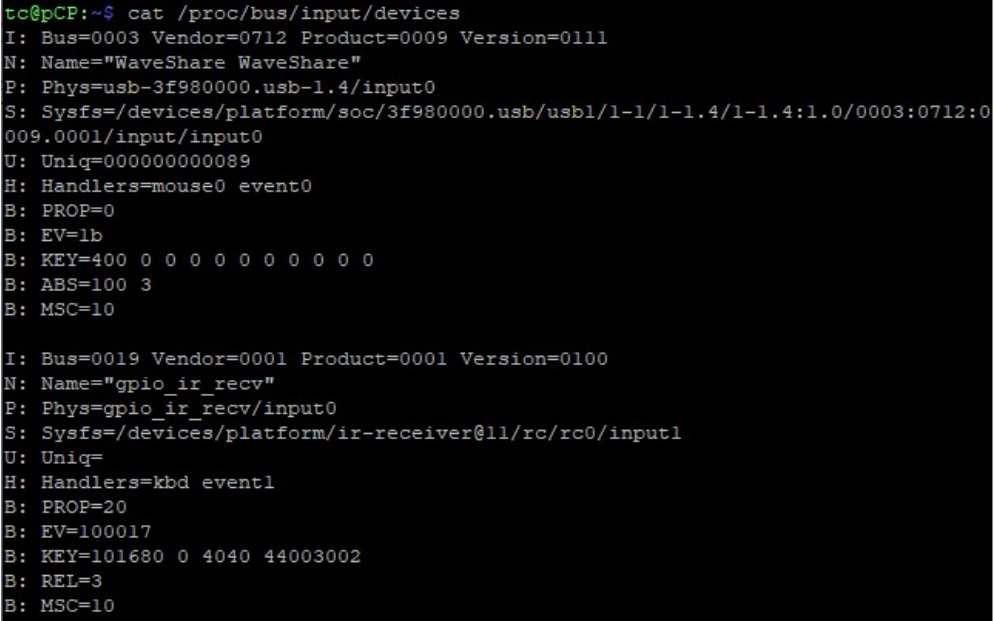
- Login to your RPi via ssh (software=putty – user: tc, password: piCore) and look, if your changes worked:
- $
cat /proc/bus/input/devices

- Take note of “Waveshare” and “event0” (If you use additional input devices (ie. IR-Receiver), the input device may be event1).
Step 4 - Creating the jivelite.sh
- $
sudo nano /mnt/mmcblk0p2/tce/jivelite.sh - Put into the empty file (copy and paste) the following script:
#!/bin/sh
# Disable mouse pointer
export JIVE_NOCURSOR=1
# Set touch calibration file
TSLIB_CALIBFILE=/usr/local/etc/pointercal
# Jivelite interface framerate
export JIVE_FRAMERATE=22
# Set Touch input device
export TSLIB_TSDEVICE=/dev/input/event0 # This might be event1 in some cases
export SDL_MOUSEDRV=TSLIB
# Define custom Skin size
# scale to 1280x400. This could be any size to scale interface.
export JL_SCREEN_WIDTH=1280
export JL_SCREEN_HEIGHT=400
# Set custom screen resolution
/usr/sbin/fbset -xres 1280 -yres 400

export HOME=/home/tc

# Run Jivelite
while true; do
	/opt/jivelite/bin/jivelite >> /var/log/jivelite.log 2>&1
	sleep 3
done
- Save your changes and exit nano (Ctrl+X and confirm by pressing y).
Info
- I don’t know, if the setting of the framerate is necessary – you can play with that.
- You can find the original jivelite.sh script at THE FAN CLUB dynamic design solutions.
- Make the new custom jivelite.sh script executable with:
$ sudo chmod +x /mnt/mmcblk0p2/tce/jivelite.sh
- Save your changes by typing $
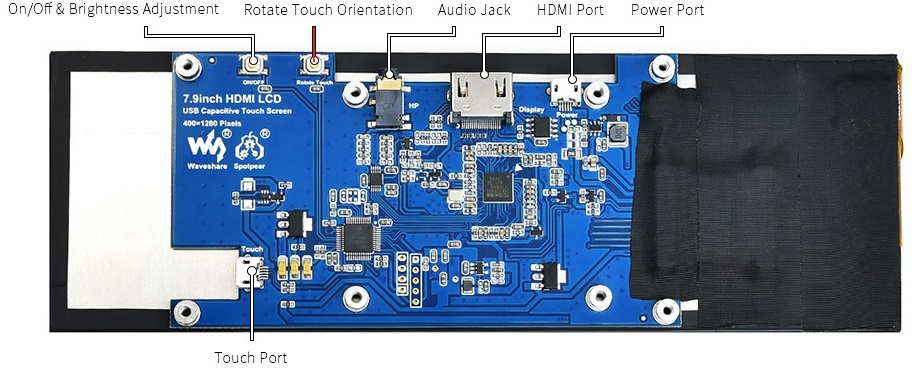
pcp bu. - Set the orientation of the touchscreen by holding the “Rotate Touch” button (backside of the display) for 5 seconds 3 times (first = 90, second = 180).

- Go to Web-Gui of piCorePlayer, section [Tweaks] and set “Jivelite Autostart” to “no”.
- Reboot your RPi.
Step 5 - Calibrate Touchscreen
- Login to your RPi via ssh (putty – user: tc, password: piCore)—see Access piCorePlayer via ssh.
- Insert the following command:
$ sudo TSLIB_FBDEVICE=/dev/fb0 TSLIB_TSDEVICE=/dev/input/event0 /usr/local/bin/ts_calibrate
- Click the 5 calibration points properly.
- Make your calibration persistent: $
pcp bu - Go to the WebGui of piCorePlayer, section [Tweaks] and set “Jivelite Autostart” to “yes”.
- Reboot your RPi.
- After the reboot, the touch of the display should work fine.
Step 6 - Adjust Jivelite to the resolution of the screen
- Connect a mouse or an IR-remote to the device to configure jivelite.
- Choose your language and in the next menu select
PiGridSkin 1280x400. - Save your changes in Jivelite Settings (Settings > piCorePlayer > Save Settings to SD-Card)
This skin is offered because of your custom jivelite.sh script. Not all menus of this skin work perfect with this resolution. You have to do some changes in the lua scripts of the PIGridSkin and, as many settings of this skin depend on settings of joggler skin, there too. Even the icons have to be resized for a perfect look. It’s much easier to make the changes on a Windows machine with jivelite installed.
You will find jivelite for Windows here: https://sourceforge.net/projects/lmsclients/files/jivelite/windows/
The file PiGridSkinApplet.lua is in the folder \jivelite\lua\applets\PiGridSkin, the file JogglerSkinApplet.lua is in the folder \jivelite\lua\applets\JogglerSkin.
To make changes you need a software like Notepad++ (editor).
Warning
Before you edit the two skins, make a backup of these two folders.
Step 7 - Change PiGridSkin
- Open the file
PiGridSkinApplet.luawith your editor. - Change the following lines:
| Line | Name | Value | New Value | Changes |
|---|---|---|---|---|
| 64 | skinvariables | 100 | 90 | Shows icons smaller |
| 65 | skinvariables | 100 | 90 | Shows icons smaller |
| 166 | alternatives | 174 | 144 | Grid height |
| 168 | alternatives | 160 | 130 | Grid width |
- Save the file.
Step 8 - Change JogglerSkin
- Open the file
JogglerSkinApplet.luawith your editor. - Change the following lines:
| Line | Name | Value | New Value | Changes |
|---|---|---|---|---|
| 2801 | controlHeight | 72 | 62 | Reduces height |
| 2802 | controlWidth | 76 | 110 | Stretches width |
| 2803 | volumeBarWidth | 240 | 510 | Stretches volume BarWidth |
| 2830 | tracklayout | -160 | -100 | Moves the track metainfos right |
| 2833 | artwork | 180 | 130 | Moves the artwork right |
| 2859 | songmetadata | 65 | 30 | Moves line titelinfos up |
| 2876 | songmetadata | +32+32+70 | +32+32+45 | Moves line artistinfos up |
| 2893 | songmetadata | +32+32+32+70+10 | +32+32+32+50+10 | Moves line albuminfos up |
| 3023 | progressbar | -160 | -140 | Moves line progressbar down |
| 3074 | special style | +29+26+32+32+23+84+40 | +29+26+32+32+23+30+40 | Moves line playtime up |
- Save the file.
Step 9 - Change Icons resolution
- Go to
\jivelite\lua\applets\PiGridSkin\images\icons_resizedon your Windows PC. - Select all icons that are 100x100 pixels.
- With the software of your choice, change them to 90x90 pixels.
- In the WebGui, select [Player/Server] mode on the bottom of the page.

- Install Samba on your device (WebGui > LMS > section Samba).
- Configure Samba Server and set shares for your home directory.

- After that, copy the complete folder
PiGridSkinfrom your windows PC to the home/tc directory of your RPi. - Create a folder
JogglerSkininhome/tcdirectory of your RPi. - In this folder, copy the edited file
JogglerSkinApplet.lua. - Login to your RPi via ssh (putty – User: tc, password: piCore)—see Access piCorePlayer via ssh.
- Copy the new folders of the skins to this folder by:
- $
sudo cp -r PiGridSkin /home/tc/.jivelite/userpath/applets - $
sudo cp -r JogglerSkin /home/tc/.jivelite/userpath/applets
- $
- Make a backup by $
pcp bu. - Reboot your RPi.
After that, most menus should look perfect.
Danger
The find menu does not work at all.
More information
- 7.9 inch Waveshare Display with piCorePlayer - forum posts
- 7.9inch Capacitive Touch Screen
- Download piCorePlayer
- Burn piCorePlayer onto a SD card
- Determine your piCorePlayer IP address
- Access piCorePlayer via ssh
- Edit config.txt
- piCorePlayer aliases
- piCorePlayer CLI
- Basic vi commands
- Raspberry Pi config.cfg
- Waveshare 4.1 TFT + piCorePlayer + Jivelite
- Documentation / fb / fbcon.txt